

其實Google的自訂搜尋相當的方便好用,因此梅干在很早之前就已將Google自訂搜尋整合到Wordpress中,同時梅干當時還是將搜尋與結果拆開來,而最近才發現到,梅干嫂的部落格竟然沒有站內搜尋,所以就想說幫梅干嫂加一下,這時才發現到現在Google的自訂搜尋與之前差好多,且之前有的設定現在也不知跑到那去的,所以只能用手動的方式來作設定,因此有想用Google自訂搜尋的朋友,不妨也一塊來看看囉!
Google自訂搜尋:
網站名稱:Google自訂搜尋引擎
申請網址:https://cse.google.com/cse/
申請網址:https://cse.google.com/cse/
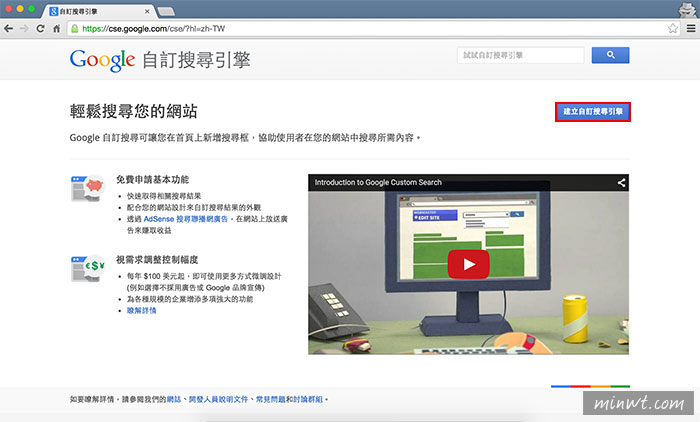
Step1
首先進入後,點一下右上角的「建立自訂搜尋引擎」。
Step2
接著輸入要搜尋的網址,若是全站搜尋的話再加/*,與搜尋引擎的名稱,搜尋名稱只要自己認得就行了。

Step3
新增好後,再點控制台。

Step4
接著再點左邊的外觀和風格選項,再選擇只顯示結果。

Step5
再按下儲存產生原始碼,就會看到灰色框中出現一堆原始碼,再把它全部選取並複製起來,而需注意到cx後會有一串編號,這在待回會用到。

Step6
接著新增一個頁面,再將剛的code貼到下方的文章輸入框中(記得先切到文字模式)。

Google自訂搜尋-搜尋框:
Step7
接著下方是搜尋框的語法,有二個地方要修改成自己的部分,分別是action=""這要輸入自己WP所建立的頁面網頁,以及在cx的部分,要輸入所產生的一串編碼。
加在要出現的佈景頁面中:
<form id=“searchform1” action=“頁面網址” >
  <input type=“hidden” name=“cx” value=“輸人cx編號” />
  <input type=“hidden” name=“cof” value=“FORID:11” />
  <input type=“hidden” name=“ie” value=“UTF-8” />
  <input type=“text” name=“q” size=“31” value=“” class=“csetext”>
  <input type=“submit” name=“sa” value=“搜尋” class=“search_btn”>
</form>

Google自訂搜尋-樣式:
Step8
再將下方的CSS樣式,貼到style.css中,由於使用Google自訂搜尋,因此在輸入框中需要有Google的圖樣才行。
加在style.css:
.csetext {
    margin-left: 20px;
    padding: 2px 5px;
    width: 80%;
    height: 30px;
    border: solid 1px #e1e1e1;
    -webkit-border-radius: 3px;
    -moz-border-radius: 3px;
    border-radius: 3px;
    background: url(http://www.google.com/cse/intl/zh-Hant/images/google_custom_search_watermark.gif) #fff 5px 50% no-repeat;
    color: #5e7380;
}
.search_btn{
    height: 36px;
    background: #eee;
    border:0;
    border-radius: 6px;
}
.csetext.focus {
    background-image: none;
}

Google自訂搜尋-互動效果:
Step9
接著下方是一些互動效果,當滑鼠碰到輸入框時,圖片會消失,以及當輸入框有文字時,也會自動消失。
加在</body>前:
<script src=“http://ajax.googleapis.com/ajax/libs/jquery/1.11.0/jquery.min.js"></script> <script> $(function(){ var $searchform = $(‘#searchform1’), $csetext = $searchform.find(‘.csetext’);$csetext.focus(function(){ $csetext.addClass('focus'); }).blur(function(){ if(!!!$csetext.val()) $csetext.removeClass('focus'); });}); </script>

Google自訂搜尋-結果預覽:
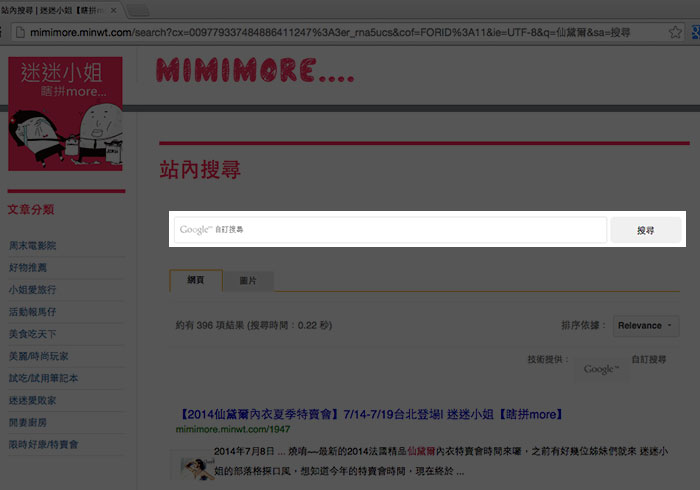
Step10
這時輸入框就出現了。

Step11
接著搜尋結果就會出現在剛所設定的頁面中啦!是不是超方便的呀!
